Smart WIO
Wio Terminal based Smart Motor
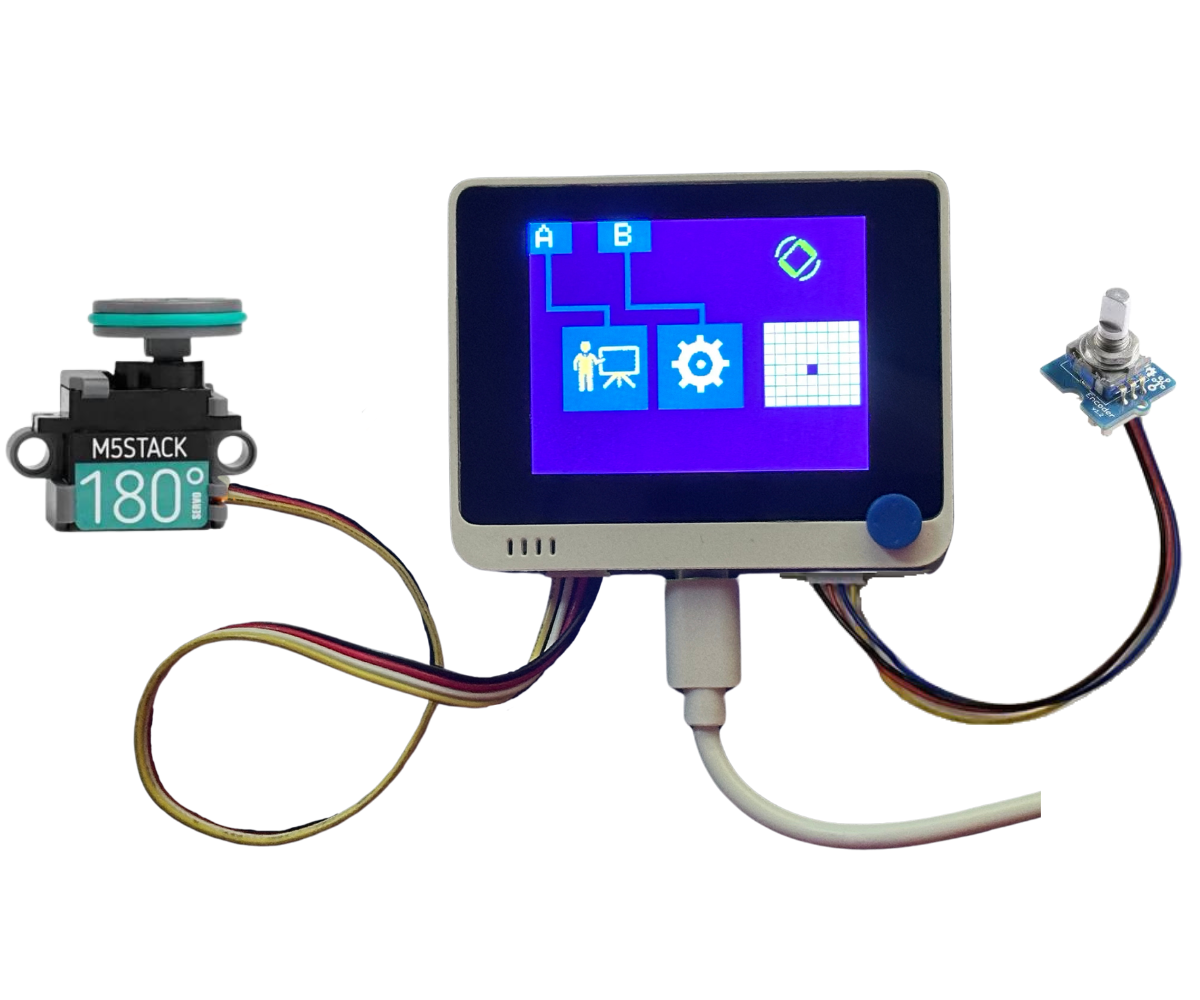
Smart WIO uses Seeedstudio's Wio Terminal, Grove servo and Grove encoder to implement the Smart Motor concept. The on-board light sensor and accelerometer as well as color display make this version of Smart Motor compact. This prototype was developed to explore the use of color display to communicate information about data, training, states to the user.
Parts Needed
Description
Implementation
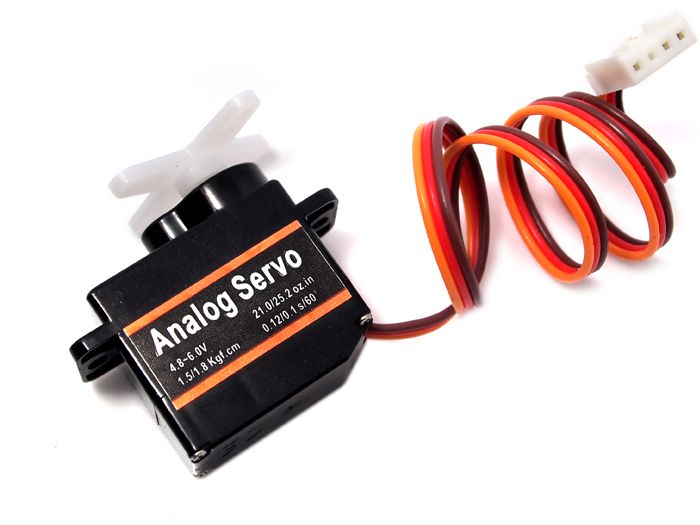
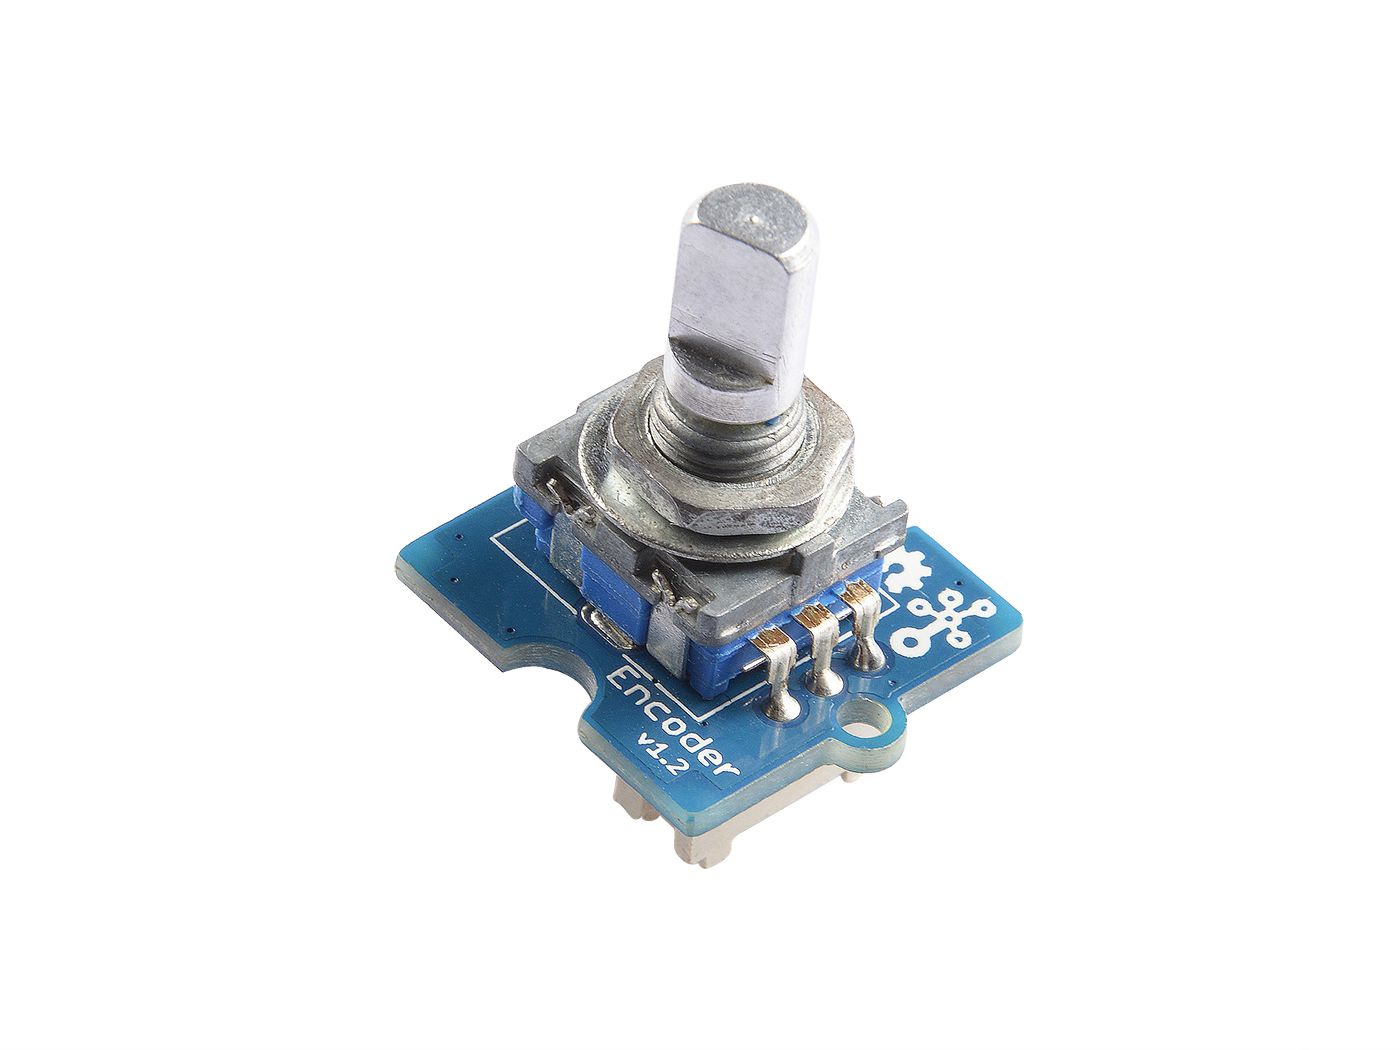
Smart Wio uses Seeed Studio's Wio Terminal microcontroller and integrates a servo motor with a Grove rotary encoder. The system utilizes the Wio Terminal's 2.4-inch color LCD screen (320 x 240 pixels) for the user interface, while the 3 configurable buttons and 5-way switch provide user input controls. The servo motor occupies one Grove-compatible sensor port, with the rotary encoder using the second available port. Beyond the rotary encoder, Smart Wio incorporates the onboard light sensor and Inertial Measurement Unit (IMU) for additional sensor input.
Navigation
The system defaults to tilt sensor upon startup. From the Home Screen users can access two main functions- navigate to the Sensor Select Screen or proceed directly to the Train Screen. The Sensor Select Screen allows users to choose from three available sensors - light, tilt, or rotary encoder. The Home Screen provides visual feedback through a sensor icon in the top-right corner and an interactive graph displaying real-time sensor readings alongside motor position. Users can manually control the motor by pressing the 5-way switch left (counterclockwise) or right (clockwise).
Training and Operation
In the Train Screen, user creates sensor-motor associations by positioning the motor at desired locations and pressing the 5-way switch while the sensor registered specific readings. Each successful pairing generates a dot on the grid interface, confirming data storage. Pressing the C button (marked with a play icon) activates Play Mode, where the motor responds automatically based on trained sensor-motor relationships. The Play Screen offers additional functionality- users can edit existing data via the C button or select between two algorithms — nearest neighbor or linear regression—for processing the training data in Model Selection Screen.
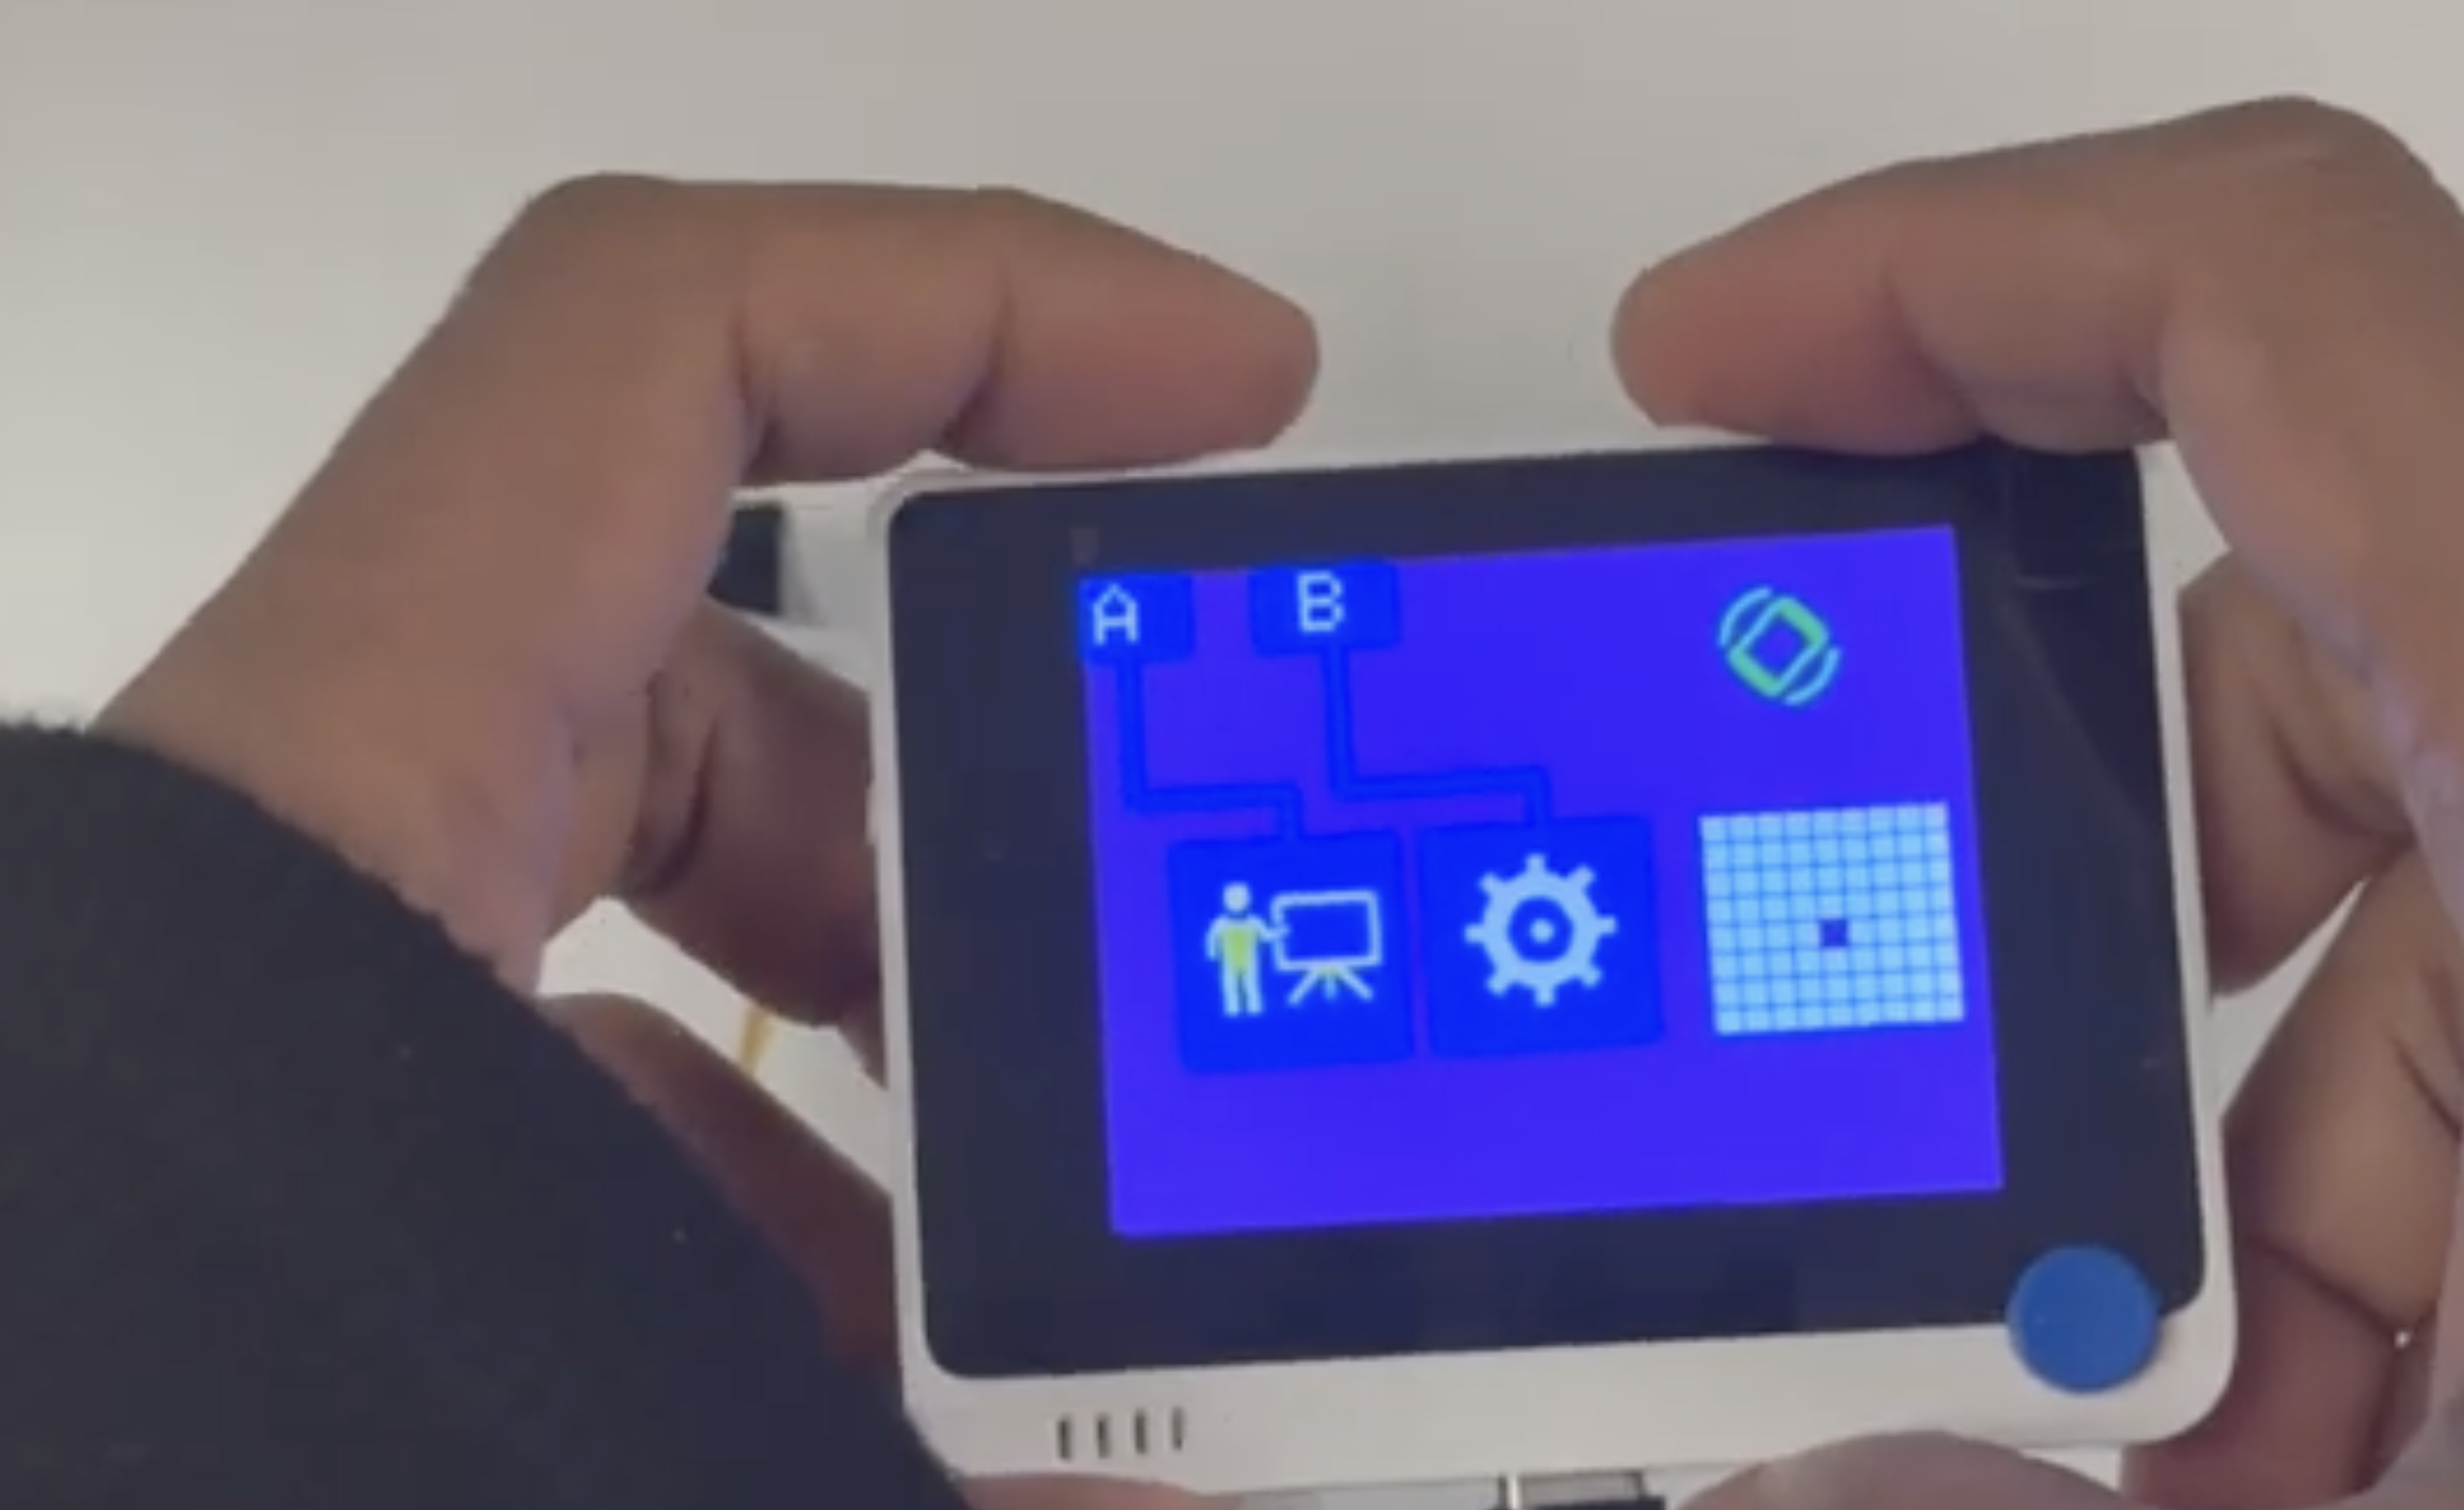
Home Screen
The screen shows the Home screen with Train and Play buttons as well as a preview window showing motor and sensor positions.
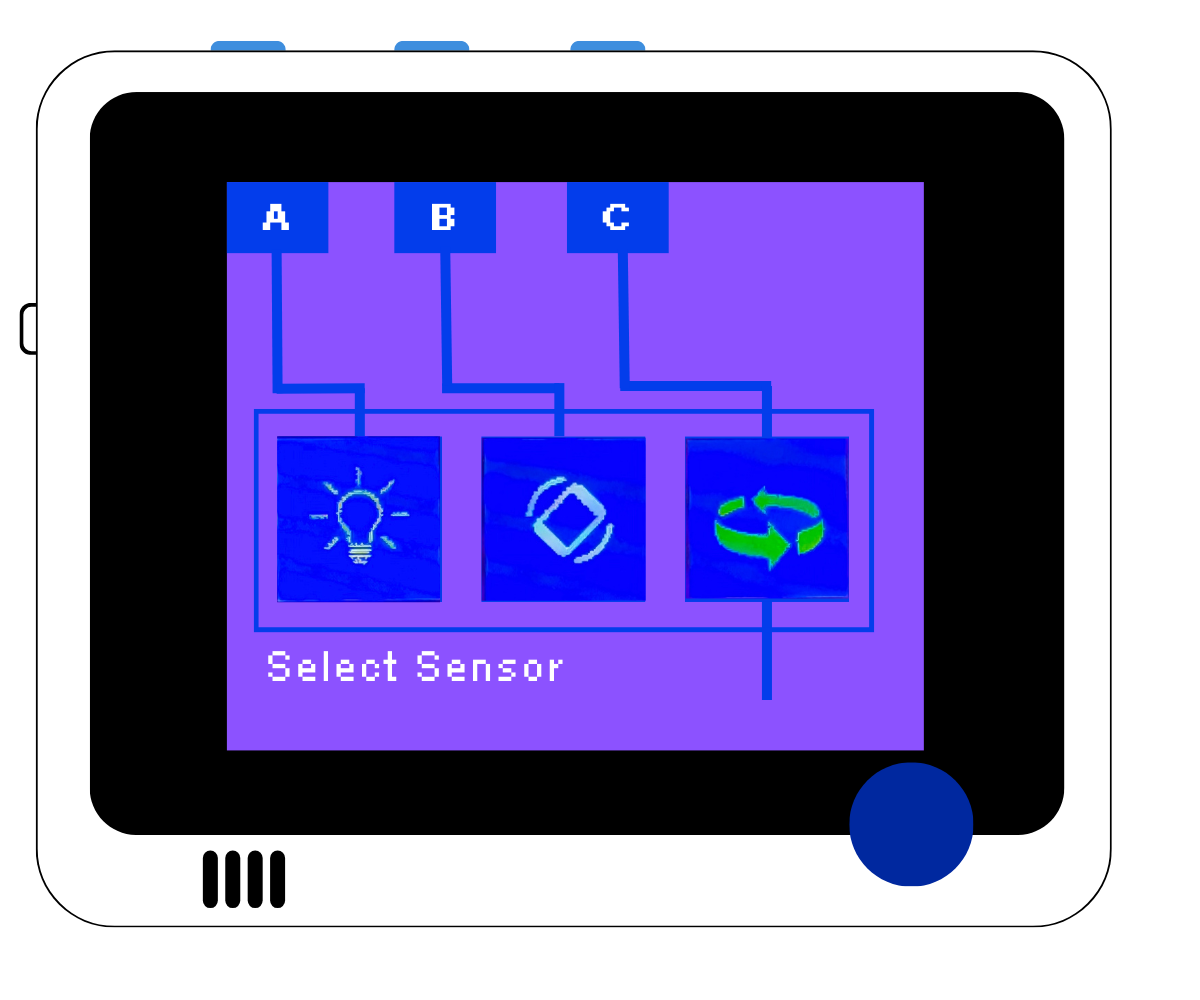
Sensor Select Screen
The screen shows the sensor select page with an option to select a light sensor, accelerometer or a digital encoder as the sensor. User makes the selection by pressing the buttons on the top.
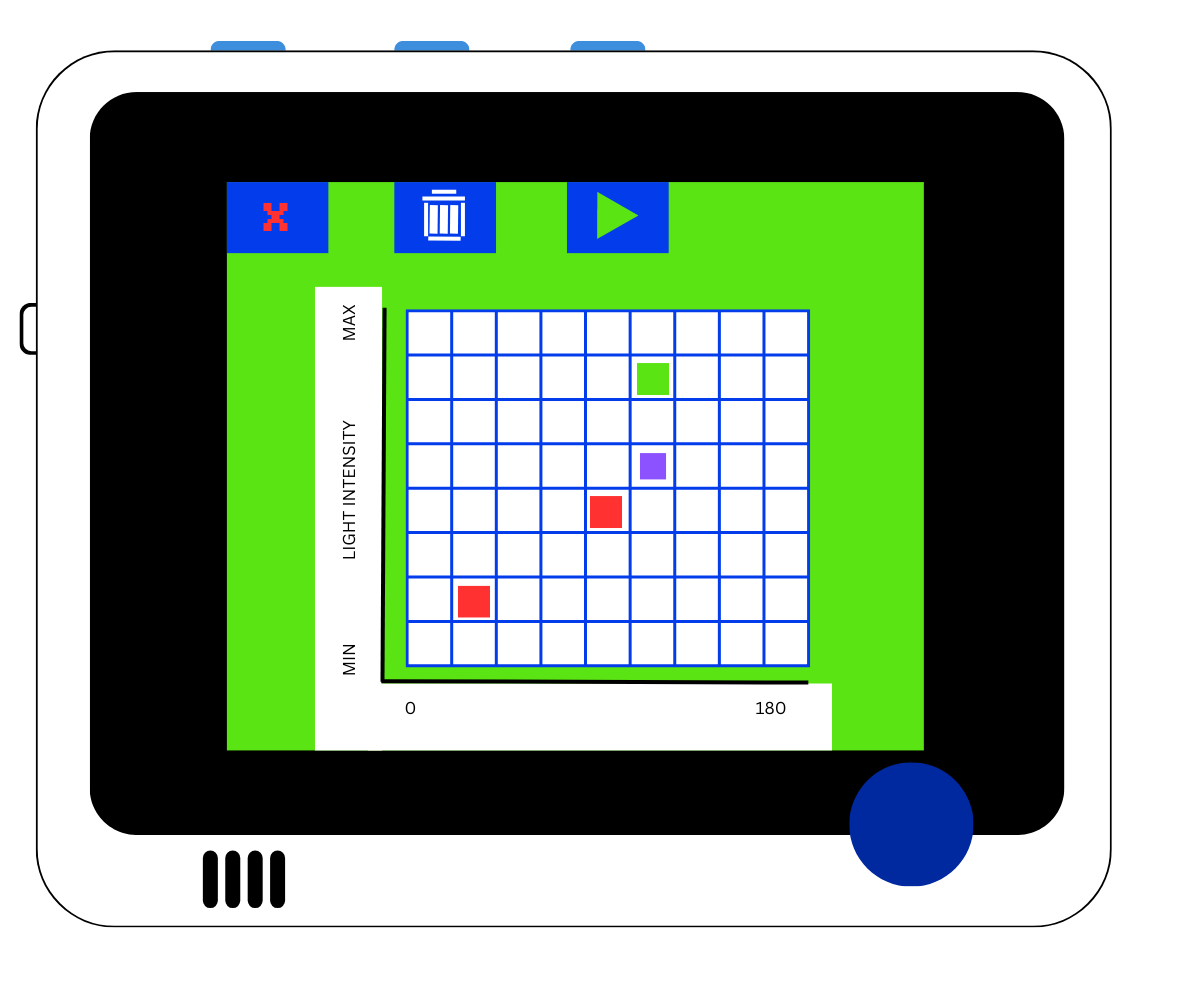
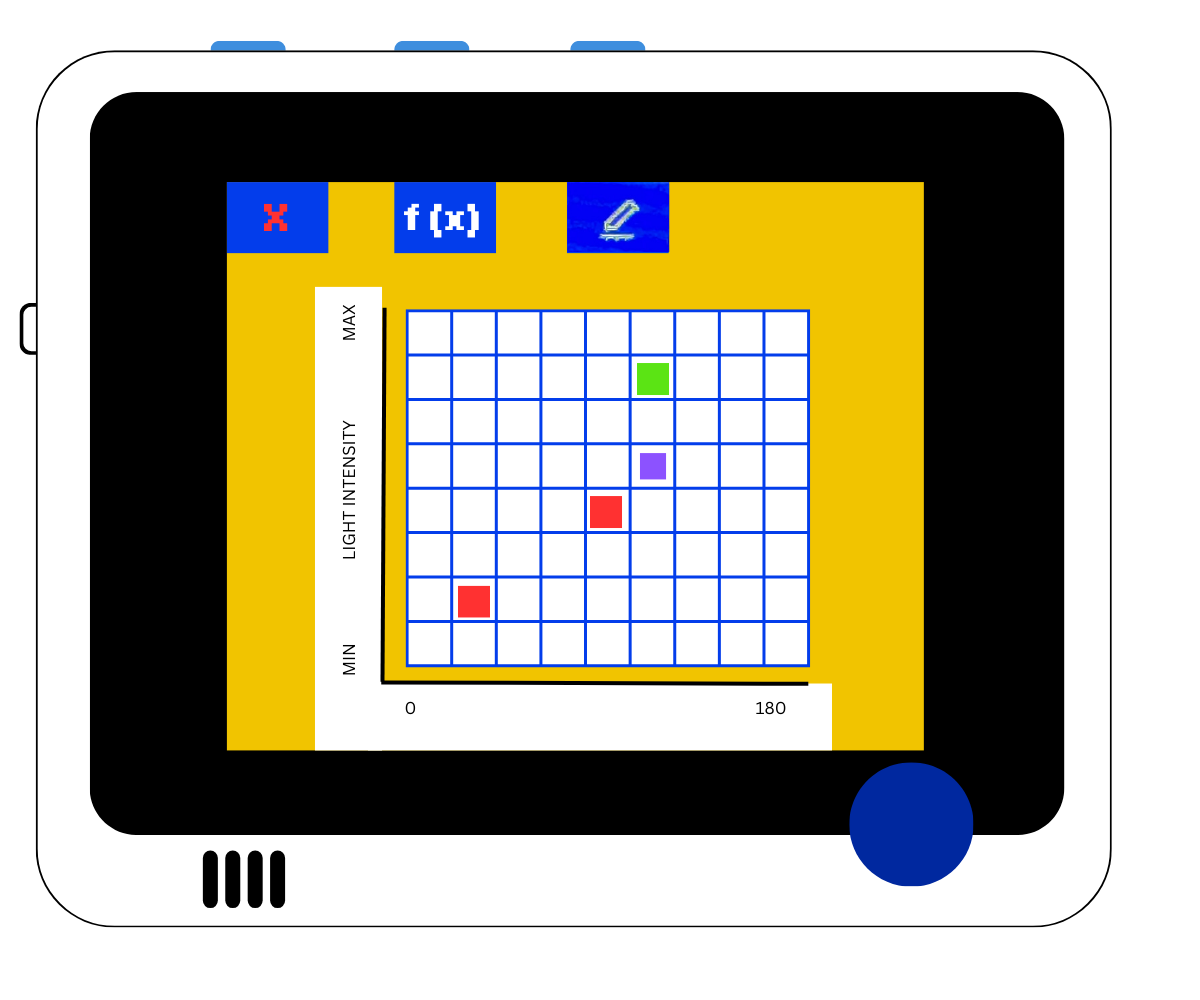
Train Screen
The screen shows the training screen. The Y-axis is the sensor value and X-axis is the motor position. Motor can be moved using the button in bottom right (left and right). Colors of the dots represent live sensor-motor pairings as well as previous data points. User has option to cancel, delete previous data point or to go to Play Screen.
Play Screen
The screen shows the previous training data as well as the live sensor-motor pairing. The users have option to cancel, edit the dataset as well as choose the training model.
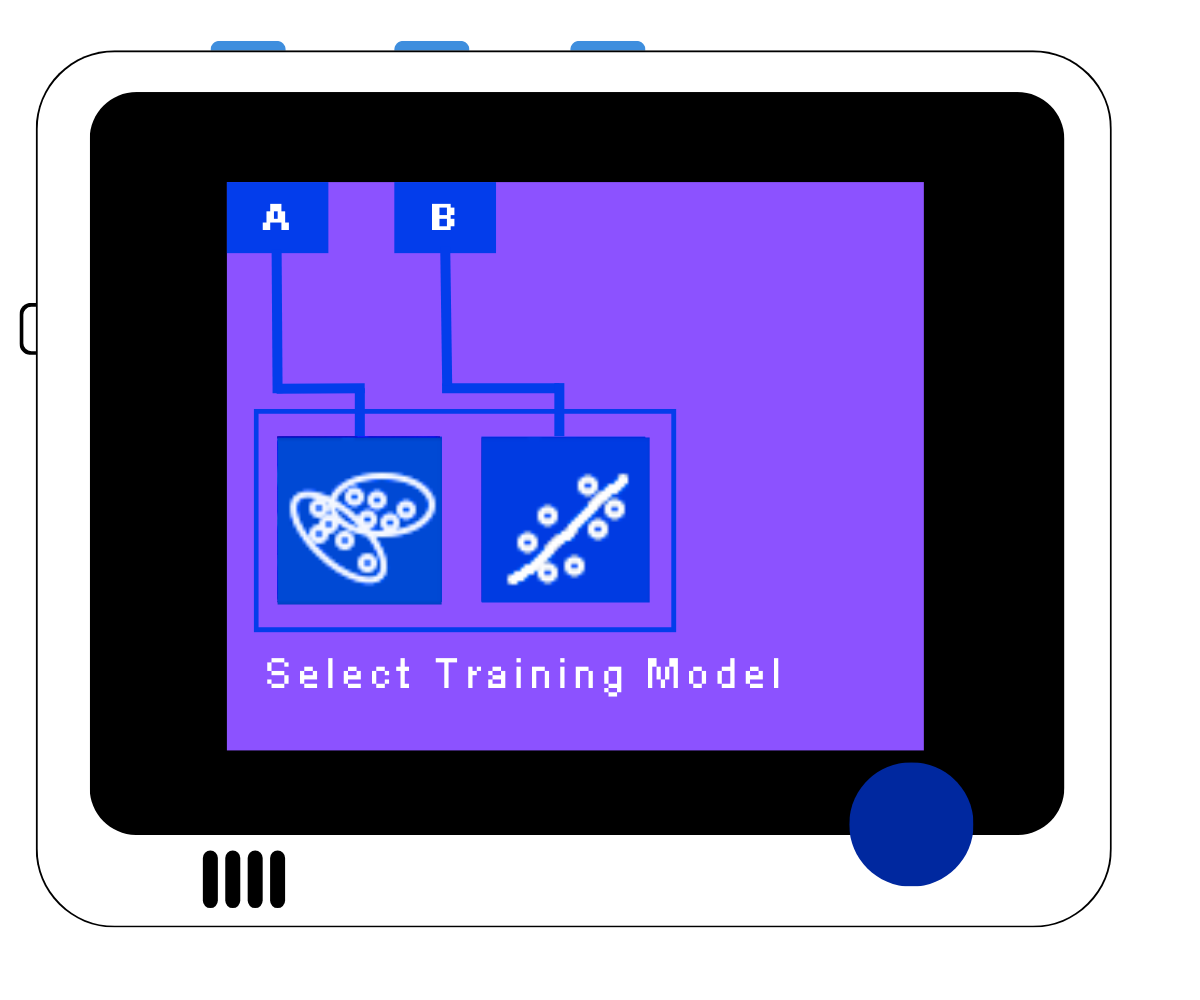
Model Selection Screen
The screen shows two available training models for the dataset. The left is K-nearest neighbors and right is the linear regression.
Flashing Wio Terminal with Smart Motors code
Smart WIO Build Guide
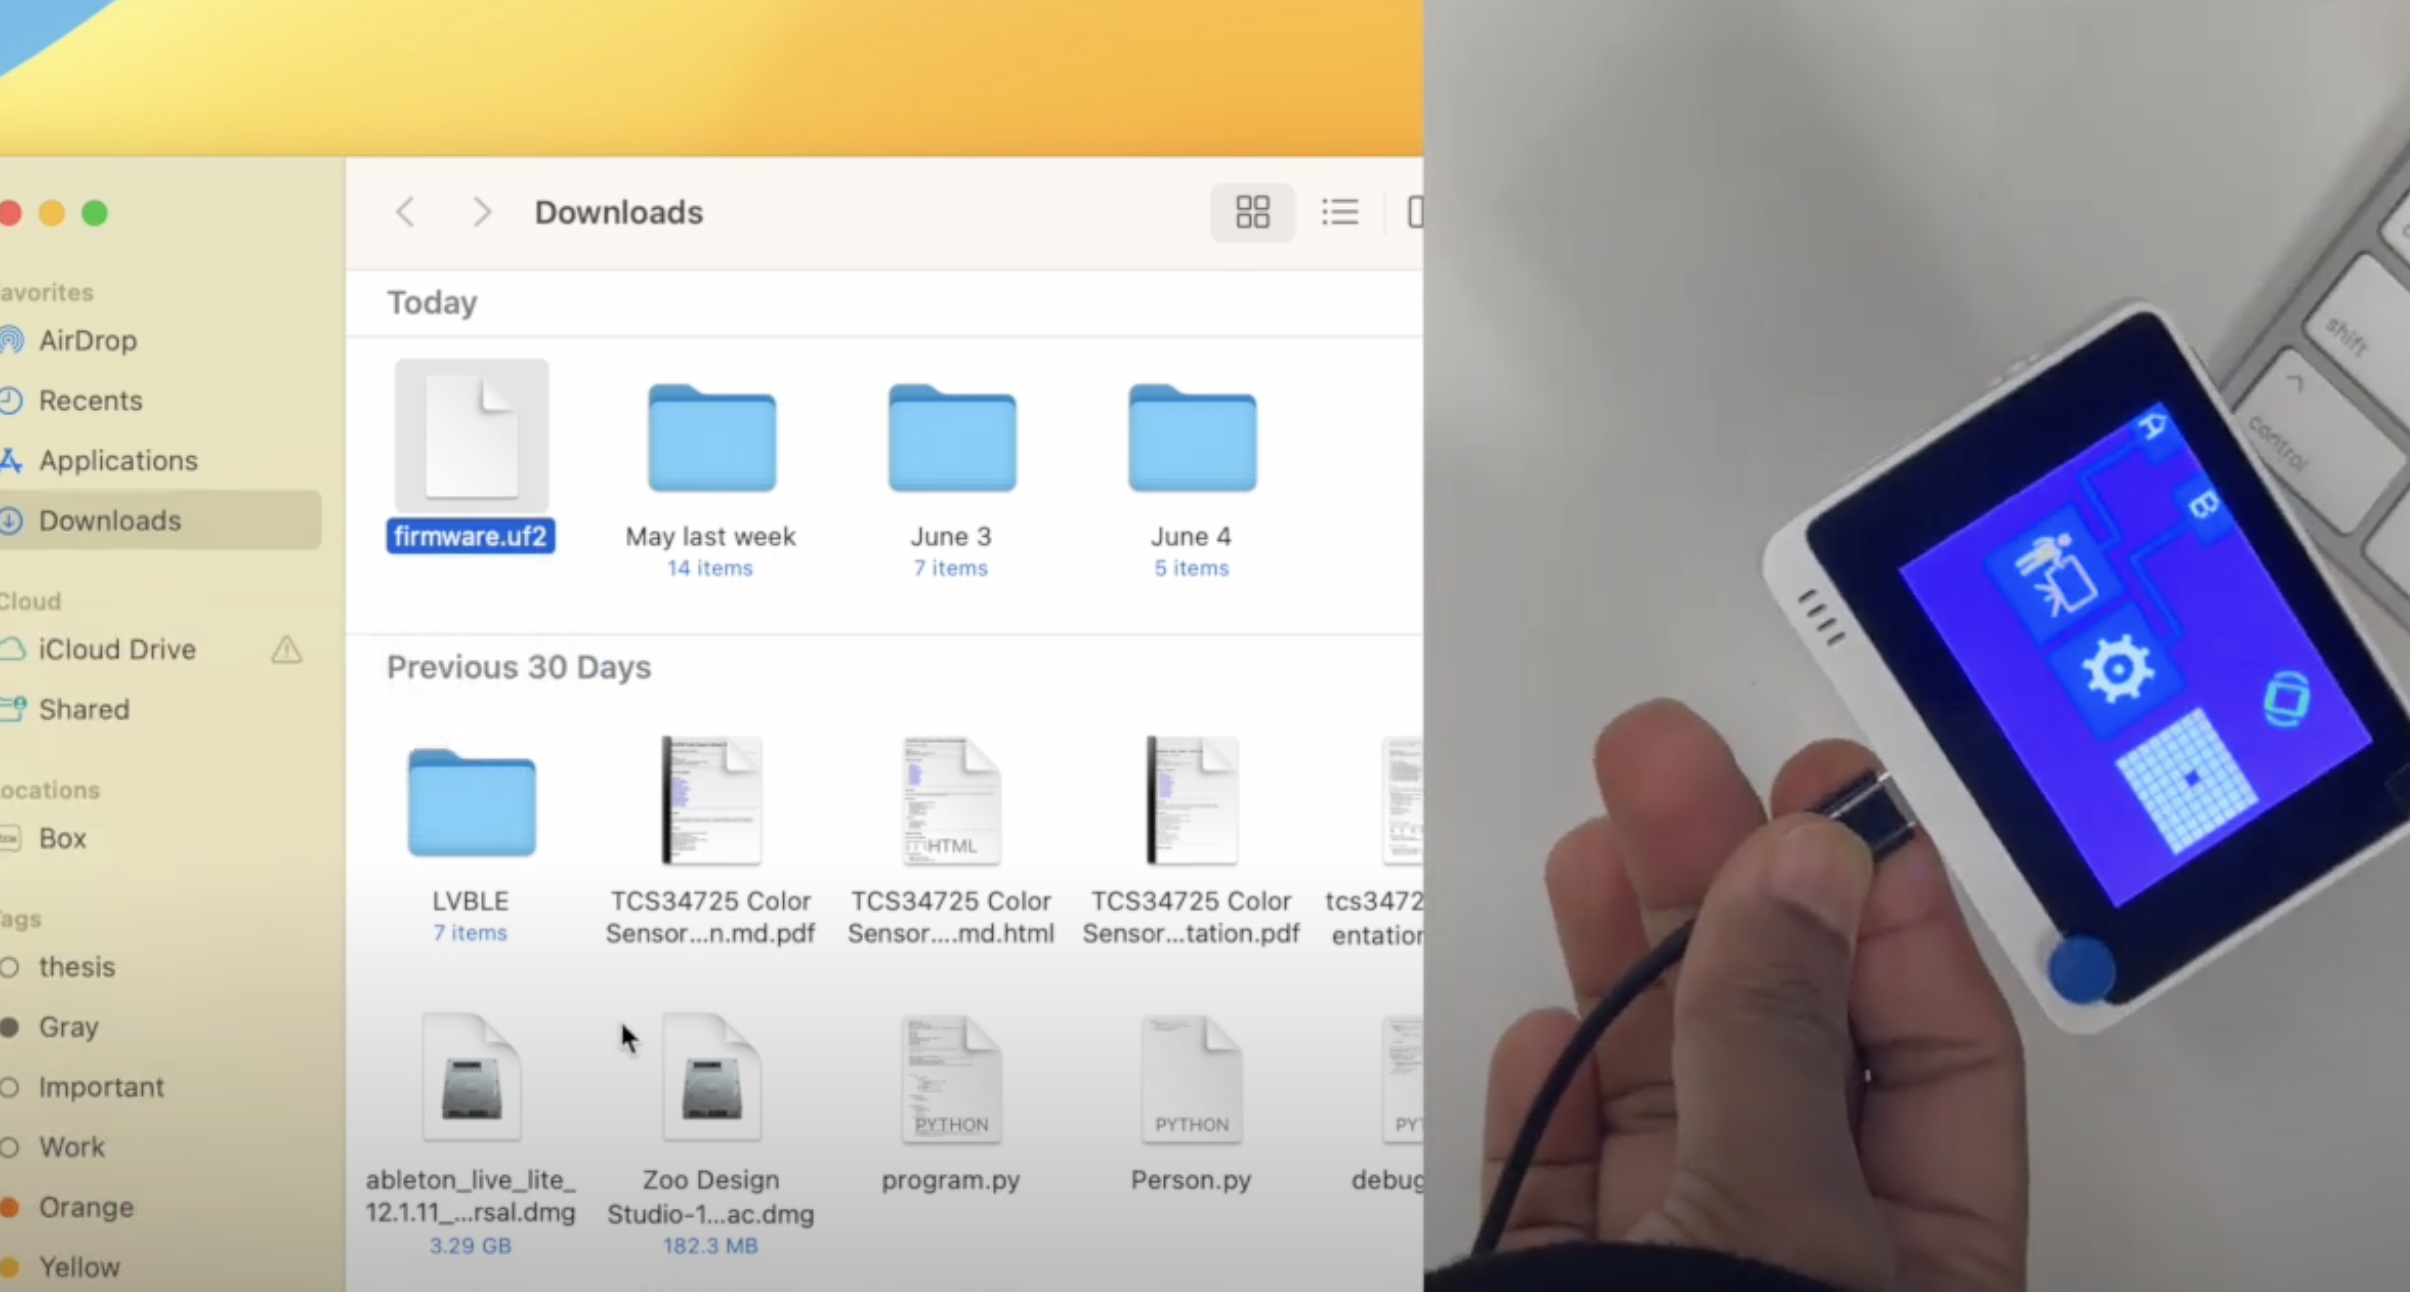
- Download the firmware by clicking the button below
- Connect Wio Terminal to your computer
- Put Wio Terminal in bootloader mode - follow video below
- Drag and drop the downloaded firmware.uf2 file in the Arduino Drive
The wiring on hobby servos and Grove servos are slightly different. If you happen to have one of the M5Stack Servos or a generic servo then use the firmware below
Smart Wio with a M5Stack Servo